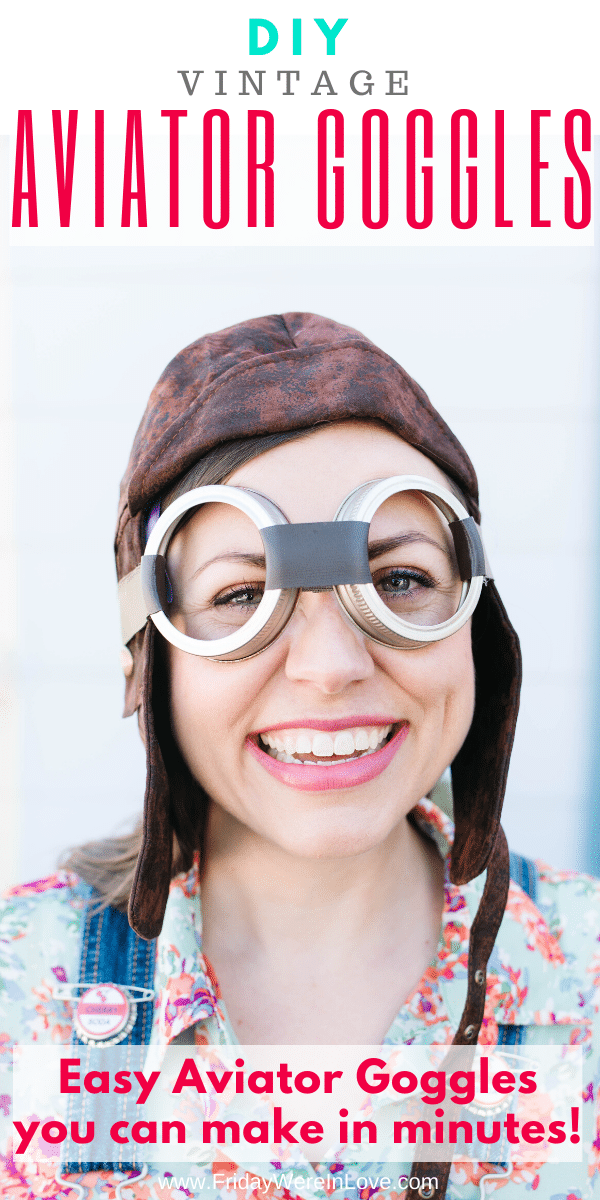
Vintage Aviator Goggles DIY
Dressing as a vintage aviator? The aviator goggles can be the hardest party to find! Here’s a simple vintage aviator goggles DIY that you can make in minutes!

Easy Halloween Costume DIY
This year our family went with a Pixar’s Up! costumes for our family Halloween costume. Because we live in Arizona, we opted to young Carl and Ellie for our costumes so my husband didn’t have to wear a full suit. It was easy to find all the pieces online, but when it came time to buy aviator goggles, I was left with few options that all seemed so expensive.
Vintage aviator goggles were a little less sleek than modern goggles, and most didn’t have dark lenses. I wanted an oversized, true vintage feel. Oversized goggles were needed, particularly since we were trying to look like children.
Vintage Aviator Goggles DIY
So I thought about for a few minutes and realized a few mason jar rings and some leather ribbon would likely do the trick. It took about 5 minutes to make two pairs, and it was such a cheap DIY that I couldn’t be more thrilled with!
DIY Vintage Aviator Goggles Materials:
- 2 mason jar rings
- 1 yard of leather ribbon
- velcro snaps (I love self-adhesive!)
- a hot glue gun and glue sticks

Make Your Own Aviator Goggles
Step one:
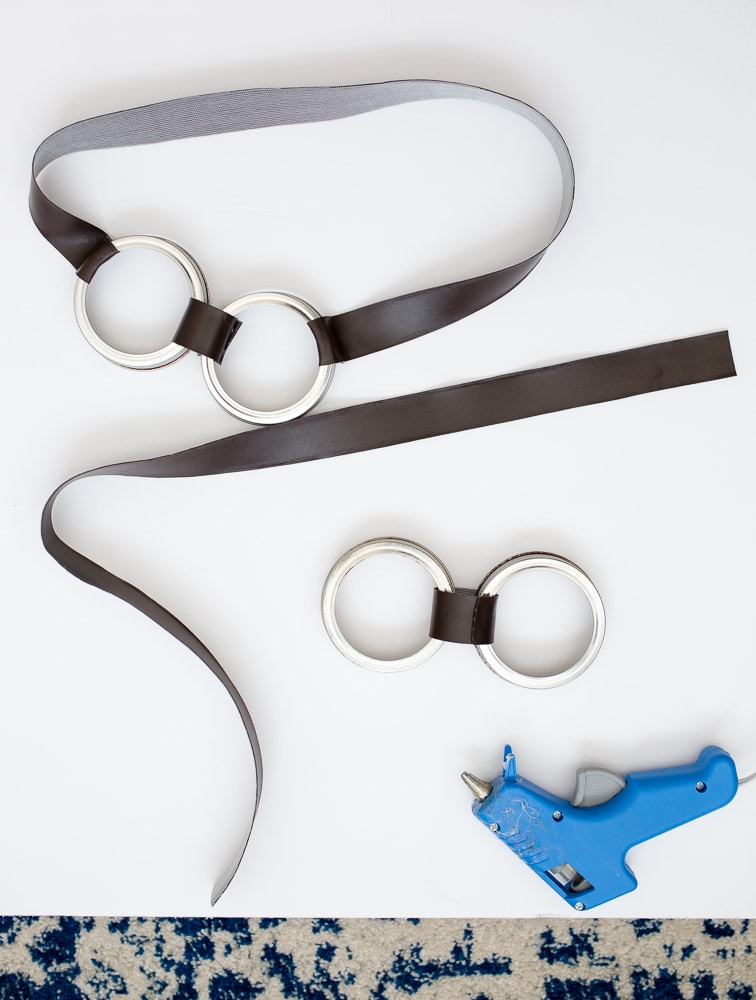
Start by measuring where you want the mason jars to fit around your eyes. There’s definitely some give, so it doesn’t have to be perfect. But generally speaking, you’ll want them to rest on your eyes and have the middle leather ribbon the right length for comfort. About 4-5 inches should be plenty. Plan for about 1/2″ extra from the perfect size; this is where you’ll glue.
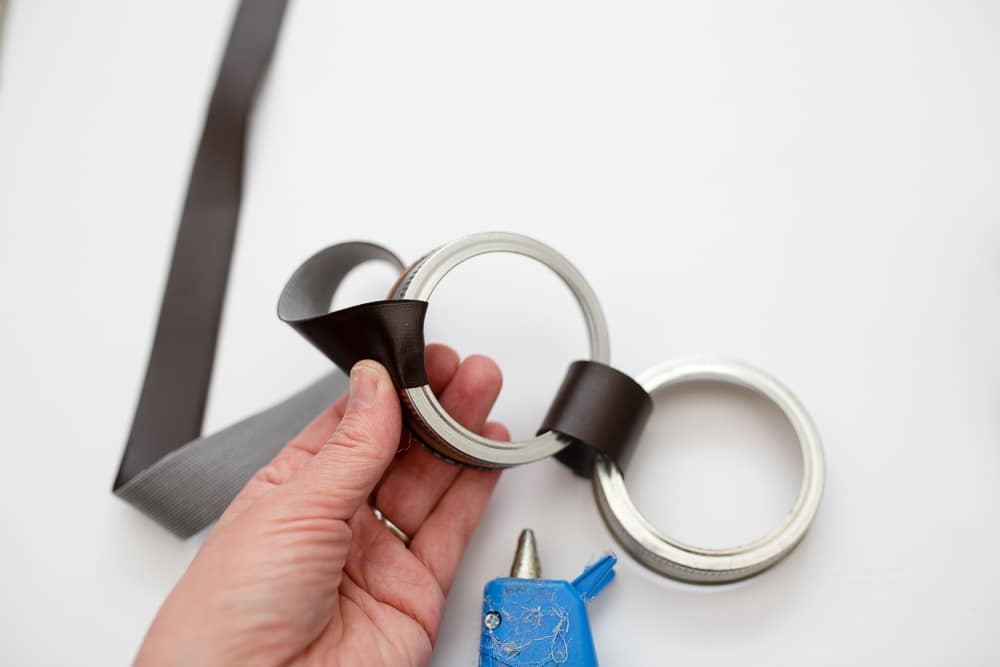
Hot glue the strip together, joining the two mason jar rings together.
Step 2:
Take your remaining ribbon and get ready to attach it to the outer edges. I wanted a little wiggle room and adjustability, so I did not glue directly to the mason jar ring. Instead, I looped the ribbon around the edge, with the outside facing the correct way.
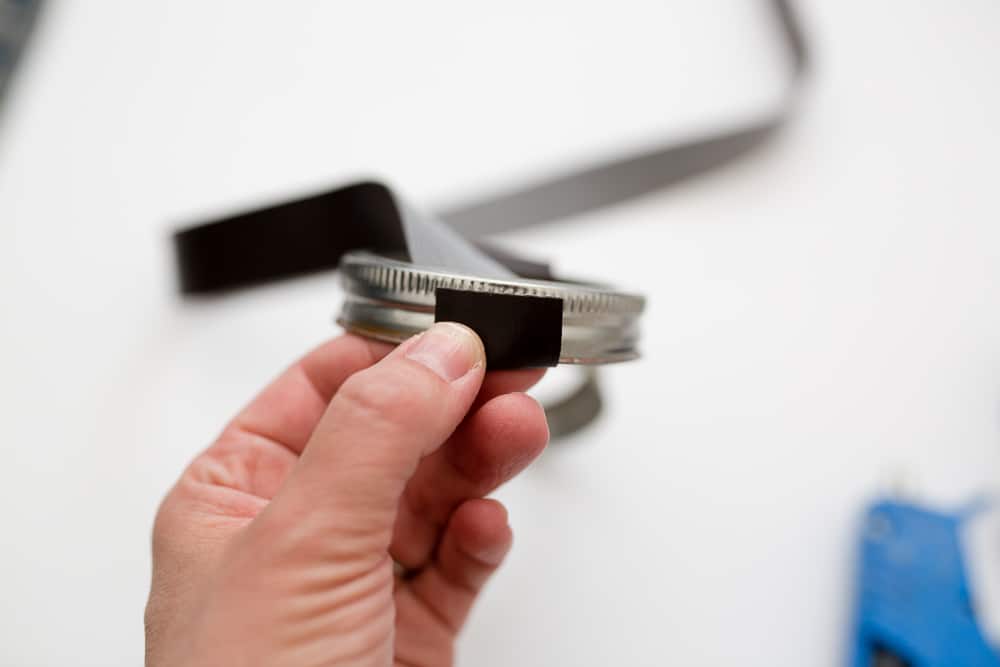

From there it was easy to glue the loop together, using hot glue on the ribbon only.
I didn’t bother to cut the ribbon in two, I knew I’d get there. I just carefully made sure the ribbon wasn’t twisted and grabbed the other end to attach.
Step 3:
Attach the leather ribbon to the second side. Use the same method, and be careful that the correct side is facing outward.
Step 4:
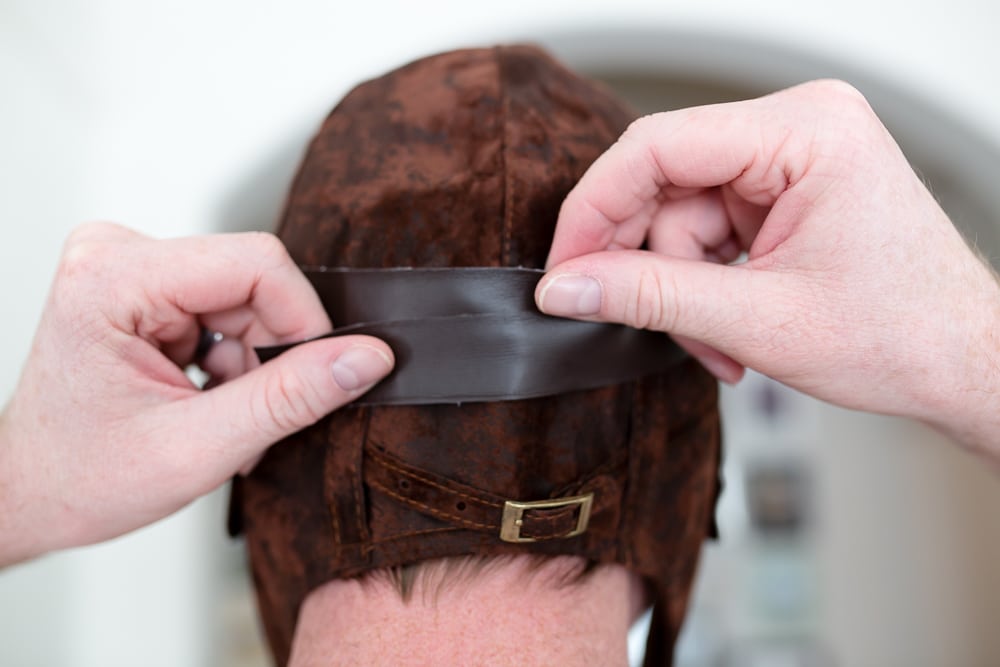
Find the middle section of the ribbon that goes around your head. You’ll want to cut it in half so you can add velcro buttons for easy use.
Measure your head and find the perfect spot to attach the velcro buttons so it will fit securely. Mark the location for the velcro for easy application.
Step 5:
Add the velcro!
We used easy peel and stick buttons that worked like a charm. If yours aren’t the peel and stick kind, hot glue gun will do the trick wonderfully!
A side note: If you want it to look very polished, I’d fold down the edges so there are no raw seams and glue those together before you add the velcro. If you don’t care, feel free to trim the raw edges after you add the velcro.
That’s it! A few minutes, some hot glue, and a quick measuring are all it takes! And then you’re ready to fly with your super cheap, fun, easy vintage aviator goggles!
Fun Costumes That Include Vintage Aviator Goggles
If you’re not going for UP!, there are so many other Halloween costumes that these could work with!
These work great for retro motorcycle operators. Think Indiana Jones and the Last Crusade for that one!
Vintage pilots are always a good fit! Add these over a pilot’s helmet, and you’ll look like you’re ready to take flight with a retro airplane! Emelia Earheart or the Wright Brothers would be such a fun take.
Inventor. I’m thinking Dr. Frakenstein using black and metal items.
Maurice from Beauty and the Beast. Belle’s dad always had oversized goggles. You could easily incorporate these into his look!
I hope these help you have the best Halloween, and complete whatever DIY costume you may go with!
Like this DIY tutorial? You may like these posts too:
Halloween Costume Pictures: Pre Trick-or-Treating {Free Halloween Printable}
Halloween 2019 Family Halloween Costume Reveal: Up! Family Costume