Pizza Skull Recipe
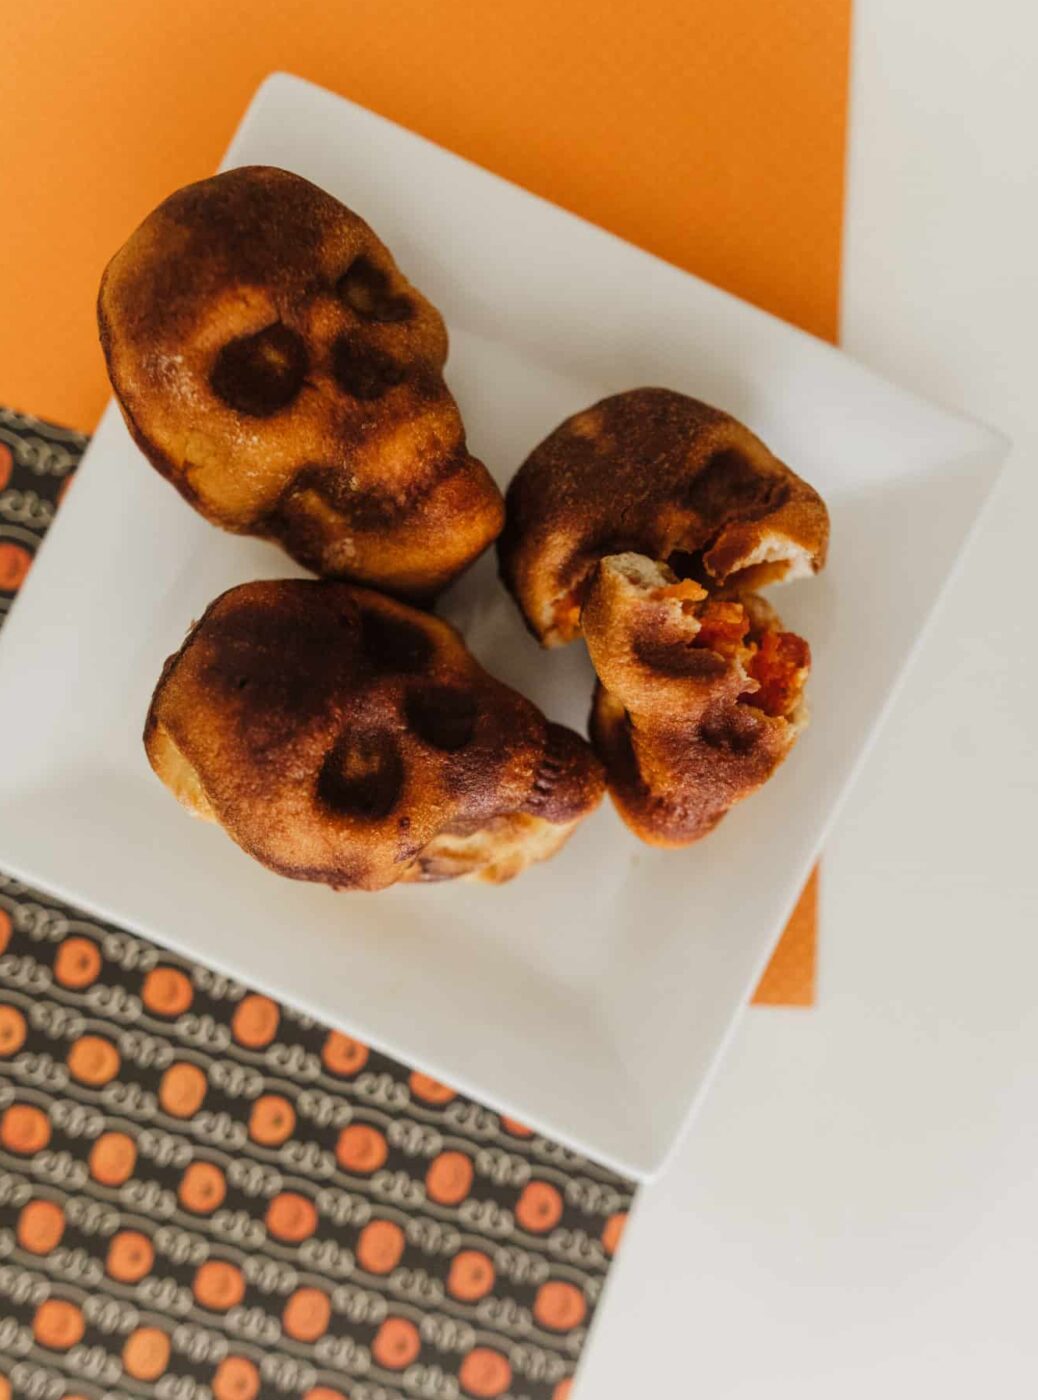
Skull-shaped Pizza may just be the perfect Halloween dinner that’s incredibly easy and the perfect amount of creepy. Here’s how to make your own pizza skulls ready for Halloween dinner.
Why Pizza Skulls are a Must for Halloween
Pizza skulls aren’t just another Halloween novelty—they’re a delicious and interactive way to celebrate the season. The skull-shaped dough adds a spooky twist to a family favorite, while the cheesy, gooey interior is satisfying and comforting. Whether you’re making them for a Halloween party, a family dinner, or just for fun, pizza skulls are guaranteed to be a hit with both kids and adults alike.
Plus, with the help of the Nordic Ware Skull Cakelet Pan, you can easily bring these eerie treats to life in your own kitchen. Not only do they taste amazing, but they also add a fun, festive element to your Halloween spread.
Pizza Skulls Halloween Skeleton Pizza
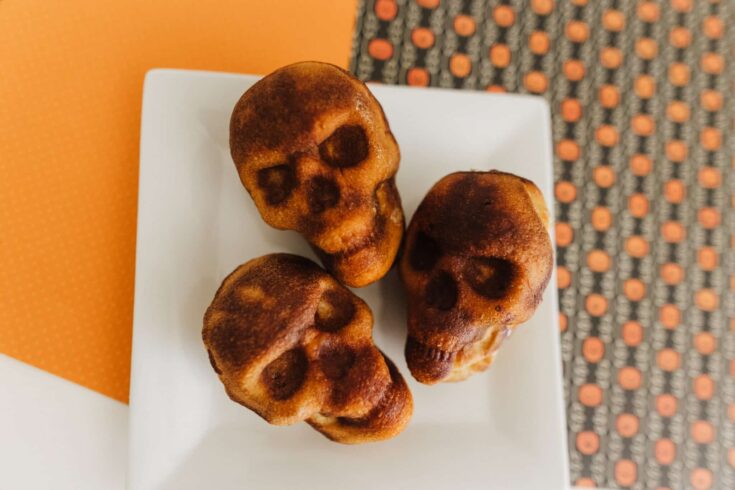
These creepy, cheesy, and downright delicious pizza skulls are perfect for Halloween parties, movie nights, or even a fun family dinner.
Ingredients
- 2 rolls of Pillsbury Pizza Dough (or 1 batch of homemade pizza dough)
- 1 jar of pizza sauce
- Pizza toppings of your choice (pepperoni, sausage, mushrooms, olives, etc.)
- 2 cups shredded mozzarella cheese
Instructions
1. Preheat Your Oven
Start by preheating your oven to 375°F (190°C). Make sure your oven rack is in the middle position to ensure even baking.
2. Prepare the Skull Cakelet Pan
Lightly spray your Nordic Ware Skull Cakelet Pan with nonstick spray or brush with a little olive oil. This will prevent the dough from sticking to the pan, making it easier to remove the skulls after baking.

3. Roll Out the Pizza Dough
Take your store-bought pizza dough (or homemade pizza dough) and roll it out on a lightly floured surface. Cut the dough into pieces large enough to cover each skull cavity in the cakelet pan. You’ll need six pieces for the base and six more for the tops.
4. Shape the Dough into Skulls
Carefully press each piece of dough into the bottom of the skull cavities, ensuring the dough fits snugly into the mold and extends up the sides. Leave a little overhang on the edges for sealing later.
5. Add the Pizza Sauce
Once the dough is in place, add a spoonful of pizza sauce into the center of each dough-lined skull cavity. Be careful not to overfill them, as you’ll still need room for your toppings and cheese.
6. Fill with Toppings
Now comes the fun part—adding your pizza toppings! Fill each dough cavity with your favorite toppings. Whether you love pepperoni, sausage, mushrooms, or a vegetarian mix, this is your chance to get creative. Don’t forget to leave enough space for the cheese.
7. Add the Cheese
Top the fillings with a generous amount of shredded mozzarella cheese. Cheese is what makes these pizza skulls ooey-gooey and delicious, so don't be shy!
8. Seal the Skulls
Take the remaining pieces of dough and place them over the top of each skull, gently pressing the edges to seal the fillings inside. Be sure to press the dough down around the edges of each cavity to ensure the skulls keep their shape while baking.
9. Bake the Pizza Skulls
Place the pan in the preheated oven and bake for 15 minutes, or until the pizza skulls are golden brown and cooked through. You can check for doneness by carefully lifting one of the skulls from the pan to see if the bottom is fully baked.
10. Remove and Serve
Once the pizza skulls are done, let them cool for a few minutes before gently removing them from the pan. Serve with extra pizza sauce for dipping, and watch your guests' faces light up when they bite into these spooky, cheesy delights!
Recommended Products
As an Amazon Associate and member of other affiliate programs, I earn from qualifying purchases.
Nutrition Information:
Yield:
6Serving Size:
1Amount Per Serving: Calories: 178Total Fat: 8gSaturated Fat: 4gTrans Fat: 0gUnsaturated Fat: 3gCholesterol: 22mgSodium: 405mgCarbohydrates: 16gFiber: 1gSugar: 2gProtein: 10g
Why You Need the Nordic Ware Skull Cakelet Pan
The key to creating perfectly shaped pizza skulls lies in the Nordic Ware Skull Cakelet Pan. This pan is designed with six skull-shaped cavities, perfect for shaping your pizza dough and fillings into spooky skulls. The nonstick coating ensures easy release and cleanup, making it the ideal pan for this Halloween-themed dish.
Not only does it give the pizza skulls their eerie appearance, but the pan also helps the dough bake evenly and keeps all the cheesy, saucy goodness sealed inside. So, if you’re ready to add a Halloween twist to your pizza game, this pan is a must-have.

Want more fun Halloween food ideas? Check out these posts too!
Jack-0-Lantern Stuffed Peppers
Get 365 Date Ideas!

We want to help you have the best date nights ever! Grab this FREE printable with 365 date ideas, a date for every day of the year so you never run out of ideas!

