Rhinestone Mickey Ears
Get ready for your next Disney trip with custom rhinestone Mickey Ears! A step-by-step guide to creating your own sparkly Mickey ears using rhinestones.

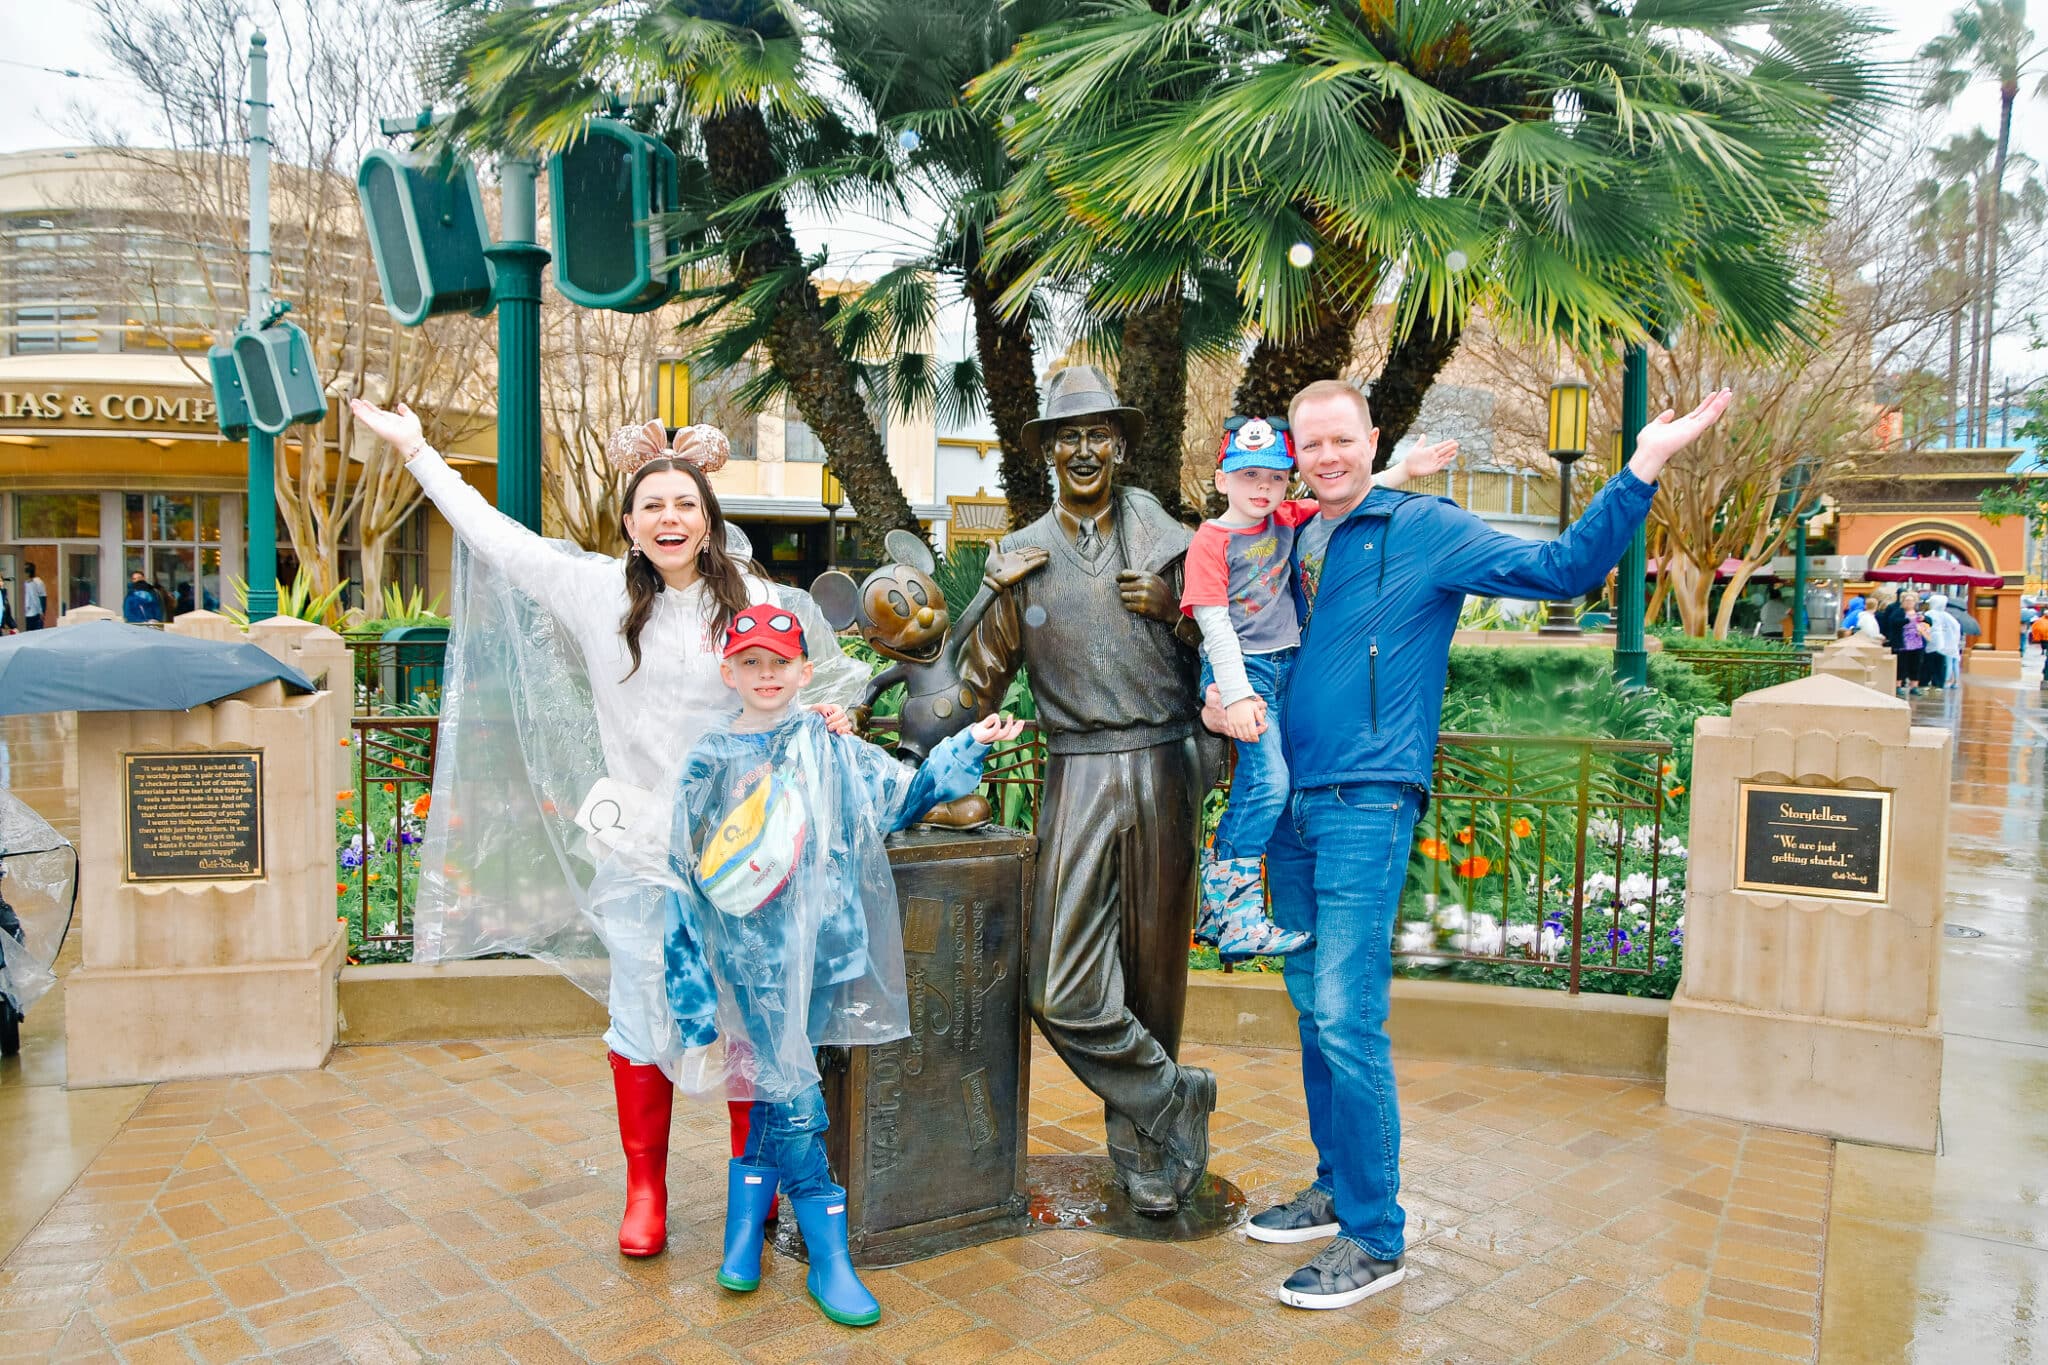
This year we became Magic Key members (Disneyland annual pass holders), and I knew I’d get a lot more wear out of my Disney ears! I’ve had a classic pair of Disney ears for about seven years, which was back when sizing was tricky. They didn’t make kid or adult sizes, they were in between and basically not a good fit for most people. Things have improved, but I’ve never wanted to spend money on the exact same pair.
Creating Custom Sparkly Mickey Ears
This year, I decided it was time to get crafty and figure out how to make my own sparkly ears! The rhinestone craft scene has always wowed me, and I knew a pair of rhinestone Mickey ears would not only be stunning, they’d be something I’d use over and over again!
I’m pleased to report I’ve now made several pairs, and I’ve figured out a lot of tips and tricks to get the rhinestone Disney ears just right. And I can’t wait to help you make your own rhinestone Mickey ears, or rhinestone Minnie ears you’ll use and love too!
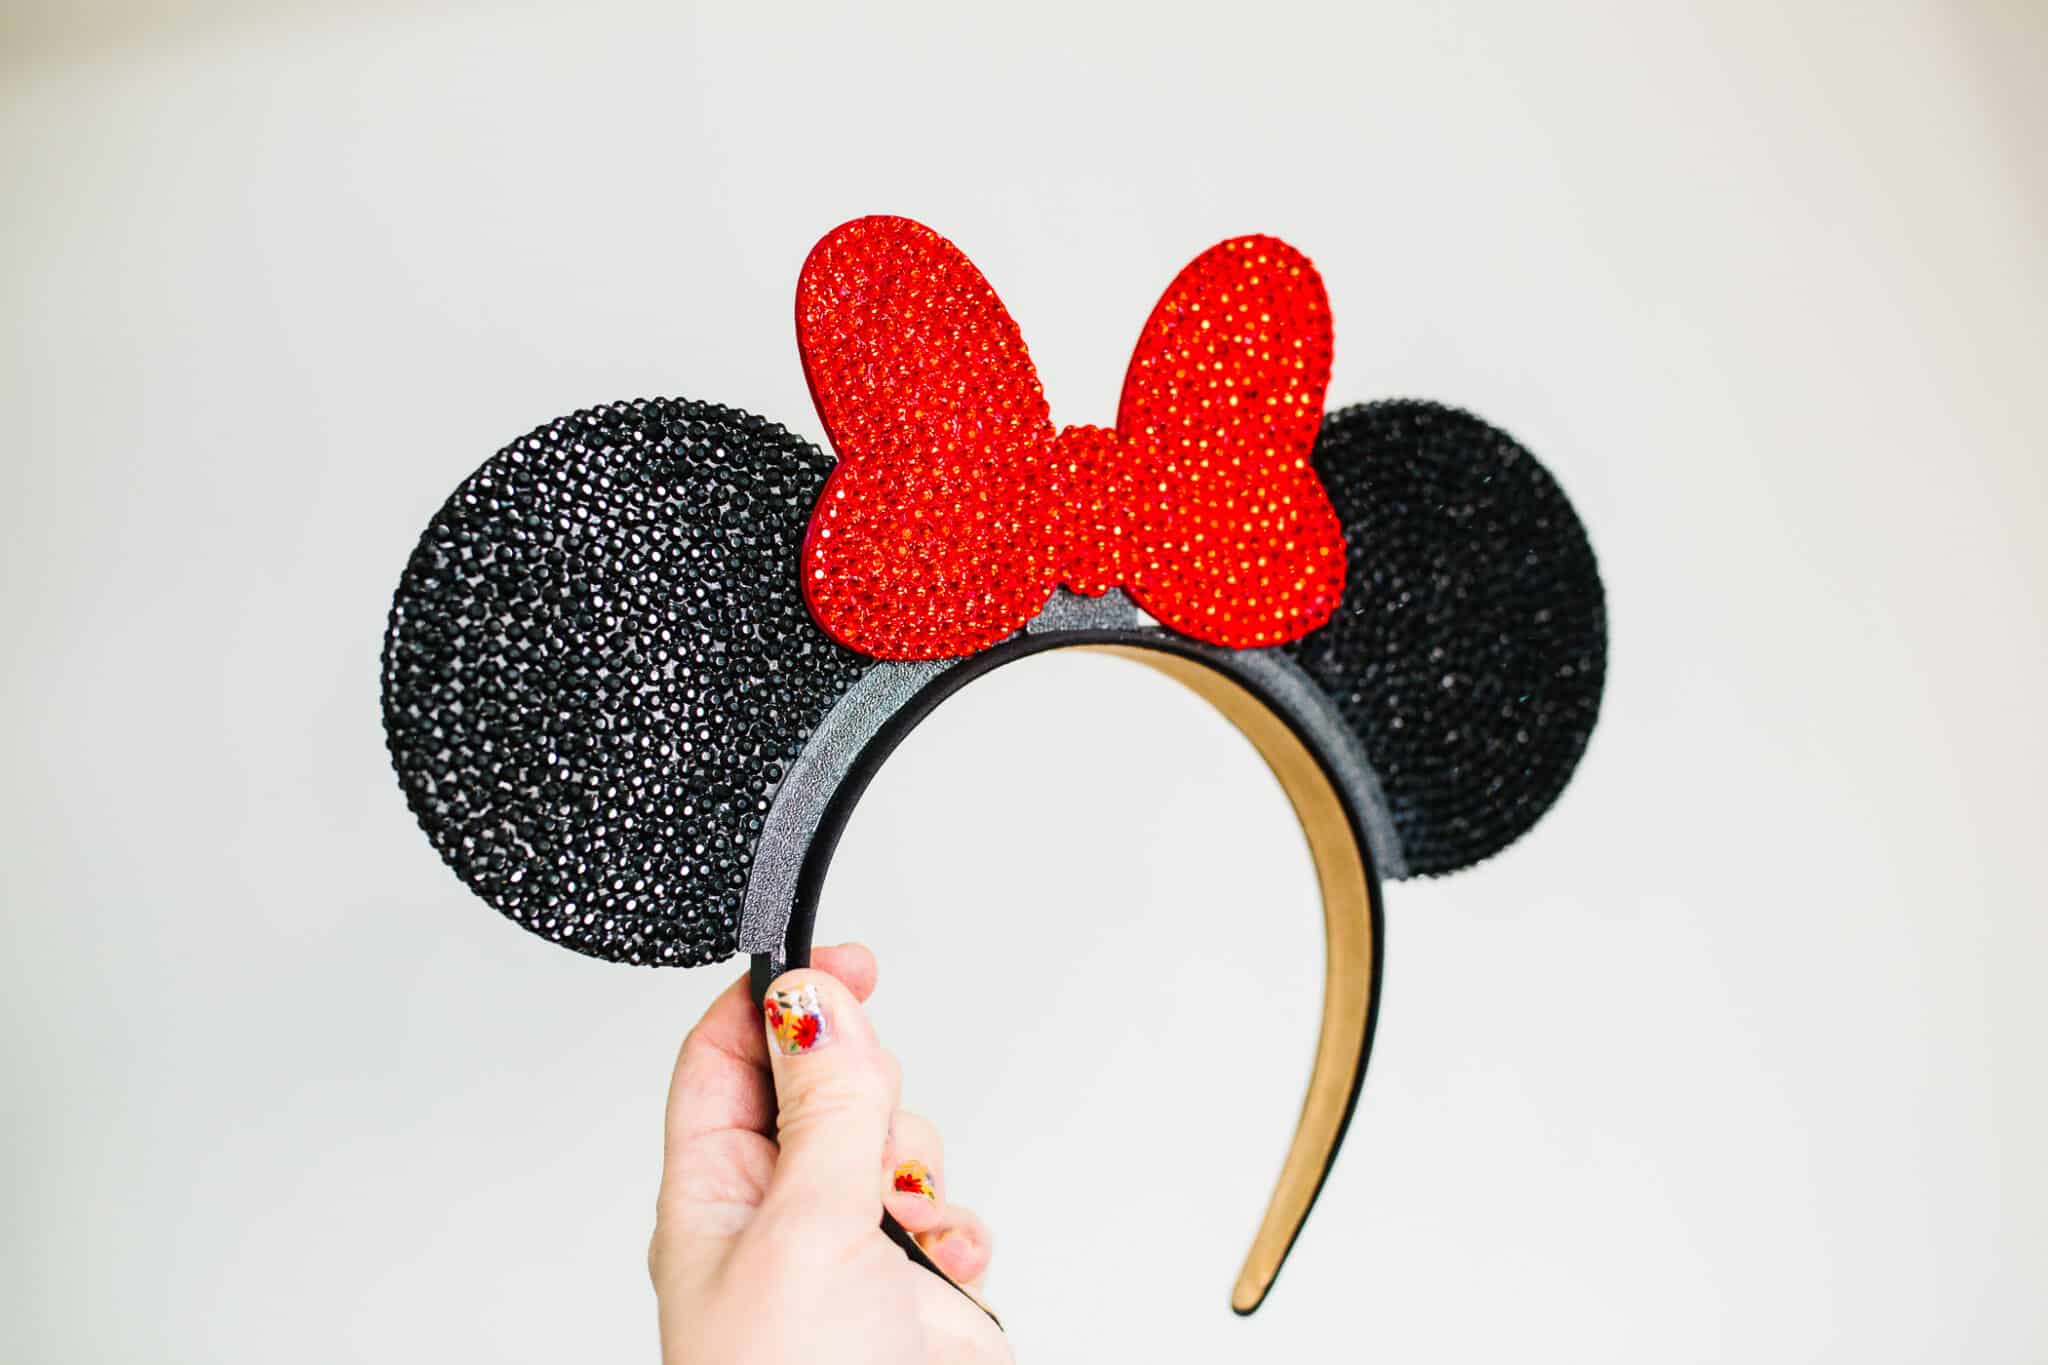
How to Make Rhinestone Mickey Ears
Rhinestone Mickey Ears
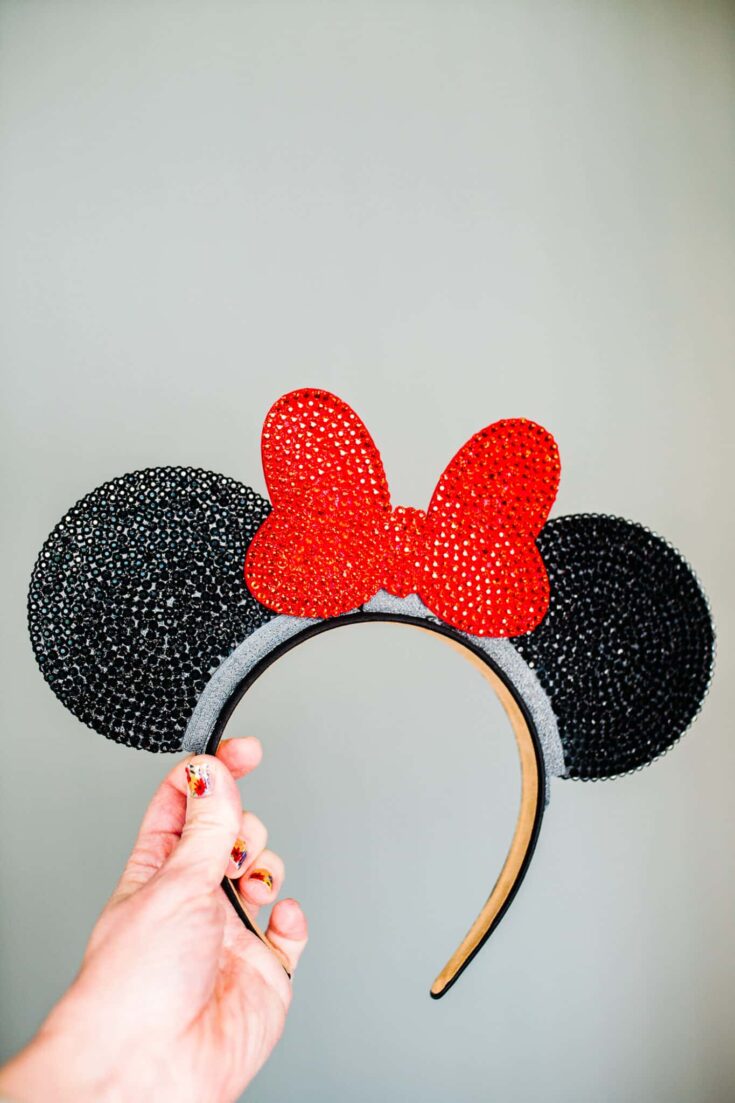
Make the utlimate sparkly Mickey ears with a little DIY rhinestone Mickey ears craft!
Materials
- - Size ss16 Rhinestones (Get one pack for hollow ears/smaller ears and two packs for a full set of standard or larger ears).
- - Ear Base (can be a pre-bought set, homemade fabric ears, or 3D printed ear base)
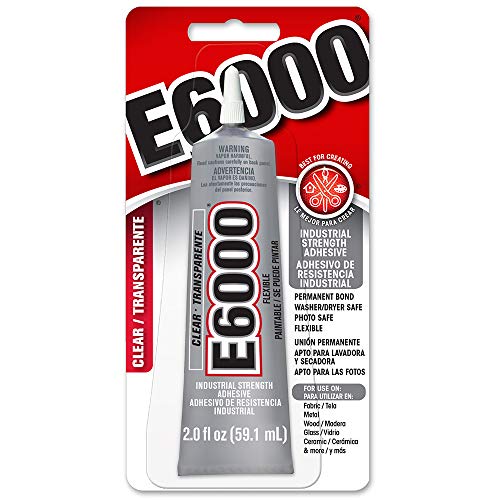
- - Gem Glue
- - (Optional) Headband if you aren't using an ear base already attached to a headband
- - (Optional) Super Glue
Tools
- - Gem Applicator
Instructions
- Make sure your ear base is clean, dry, and lying flat on the first side. *See note about an optional step you may want to consider.
- Apply a thin layer of gem glue to the outside edge of the ears.
- Using your gem applicator, apply rhinestones in a uniform line using the outside curve as your guide. You'll want this outer edge to be as uniform as possible, and extend right to the edge.
- Apply another thin line of glue next to your row of applicated rhinestones. Do your best to try to stack the rhinestones honeycomb style in between each other. But if they line up with the curve, it's okay! Just do your best to try to cover the surface area and keep rhinestones as close as possible.
- Repeat a thin layer of glue with an application of rhinestones keeping the circular pattern.
- When you arrive to about a quarter size circle left, you have two options. You can either keep going and just try to squeeze the last few in the middle. Or, you can make linear rows and apply them in the honeycomb pattern.
- Carefully turn your ears to the outer edges, and apply a thin layer of glue to a small section. We recommend using the honeycomb pattern and create a diagonal line the width of your edge. Do a few rows and make sure they light up and you have the right amount of rhinestones to cover the area before the glue starts to dry. But once you have a small section figured out, it's easy to continue the pattern and finish the ears.
- Flip to the other side of the ears, and repeat your rhinestone application starting with the outer edge and building the pattern towards the center.
- Allow to dry overnight for best results.
- Optional: Rhinestone a bow if you want to make Minnie rhinestone ears.
- Attach your ears and bow to a headband with the permanent adhesive.
- Enjoy wearing your customized Mickey ears and rocking all that bling with the cutest Mickey rhinestone ears!
Notes
* Consider painting your base the same color of your rhinestones. We used a basic acrylic red craft paint for the bow, and it REALLY made the rhinestones pop! It also gives a little bit of forgiveness to your project if your rhinestones don't align perfectly.
Recommended Products
As an Amazon Associate and member of other affiliate programs, I earn from qualifying purchases.


We hope these help inspire some extra bling, and a little moment of feeling bejeweled on your next Disney vacation!
And if you make a pair, be sure to share on Instagram and tag @Fridaywereinlove so we can see what you come up with!
Like this Disney-inspired post? Be sure to check out these posts too:
Surprise Disney Trip Reveal Ideas (Plus a Free Printable!)